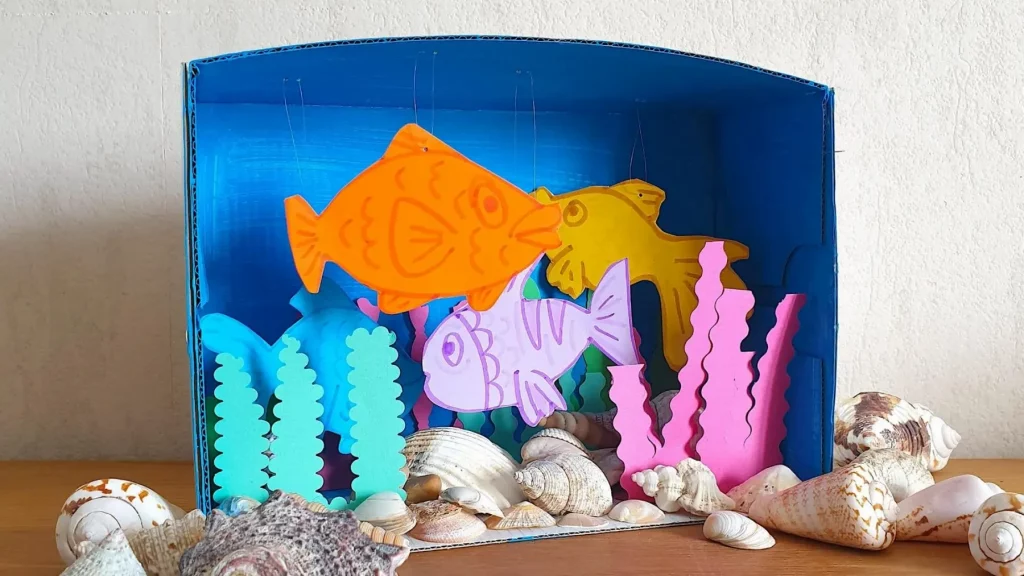
If you wish you were on holiday you can pretend you are by the sea with this activity! Follow our step-by-step guide and create a cardboard aquarium with fish that move in the water. It’s simple and the result is very pretty!
You will need
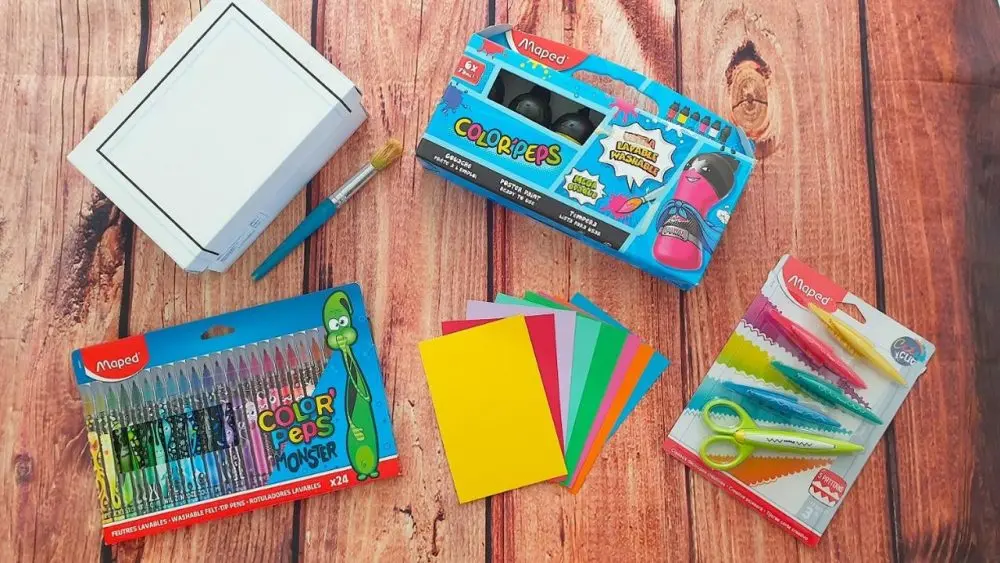
 Shoebox
- Coloured paper
- Scissors
- Paint
- Paintbrush
- Glue
- Felt tip pens
- Nylon thread
- Thumbtack
Steps
Step 1
Gather the necessary materials. A white shoebox works best.
Step 2
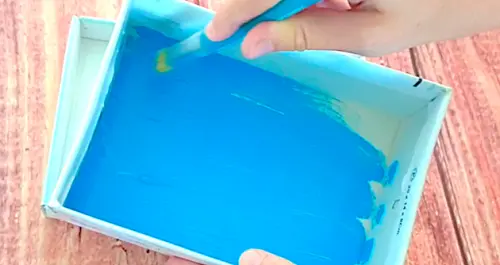
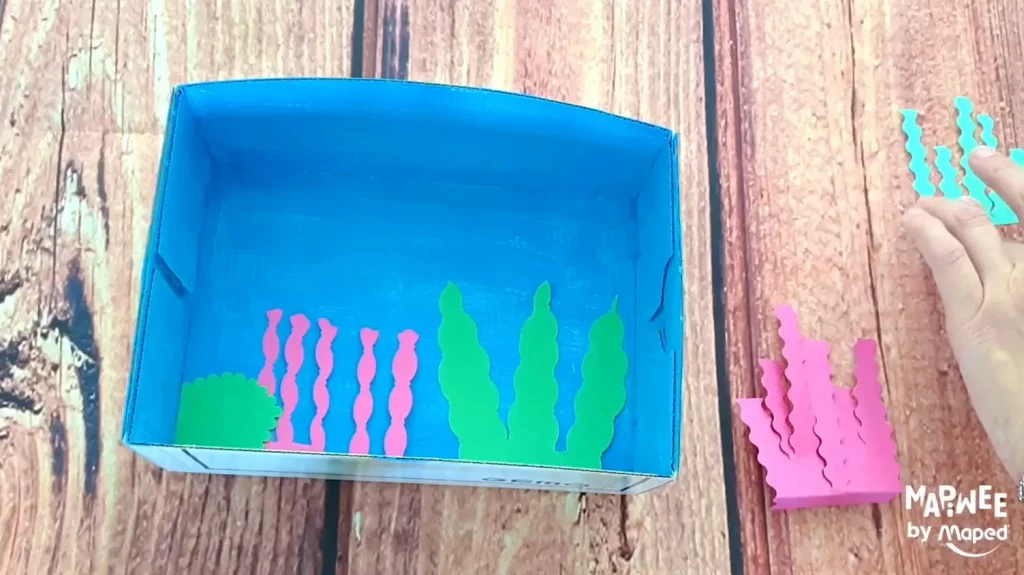
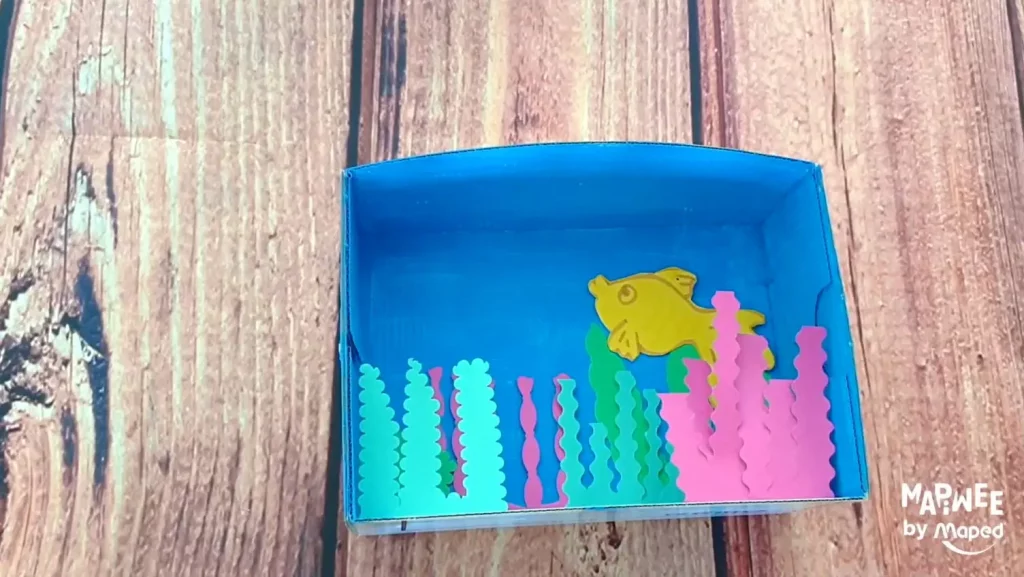
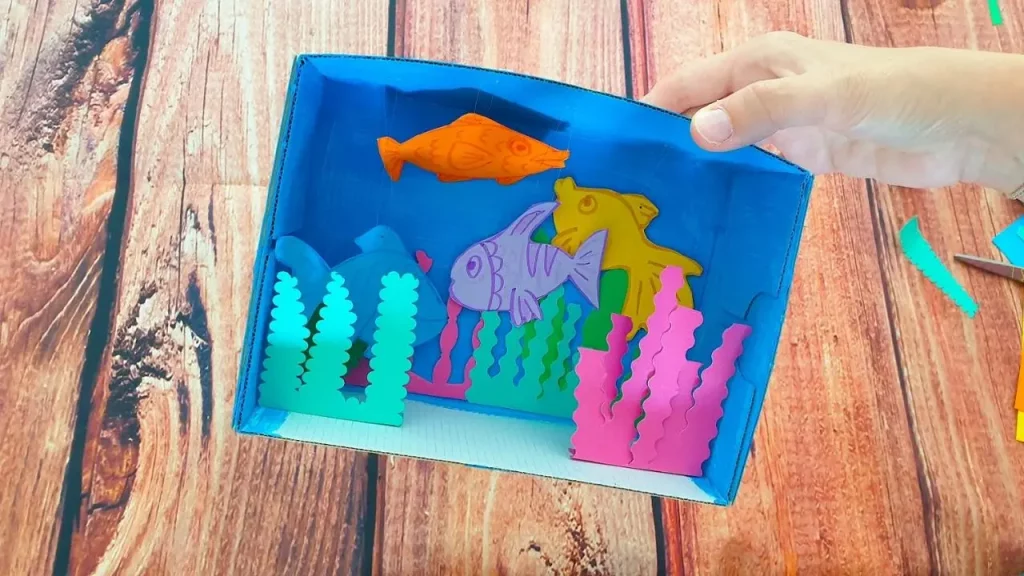
Paint the inside of the box turquoise blue or line with blue coloured paper.
Step 3
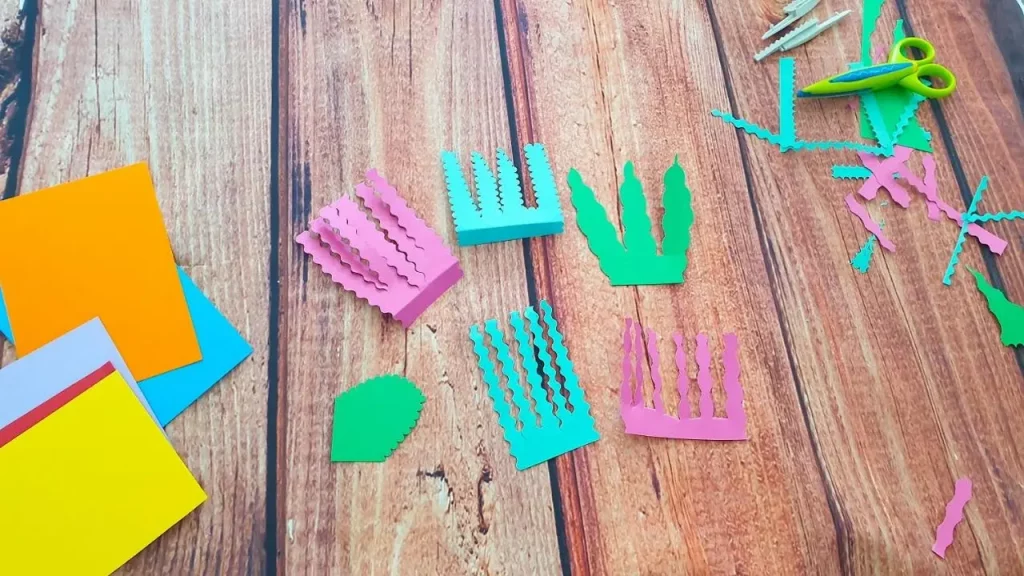
Cut seaweed and coral of different shapes and colours from the coloured paper.
Step 4
Glue the seaweed and coral onto the bottom of the aquarium to create your background.
Step 5
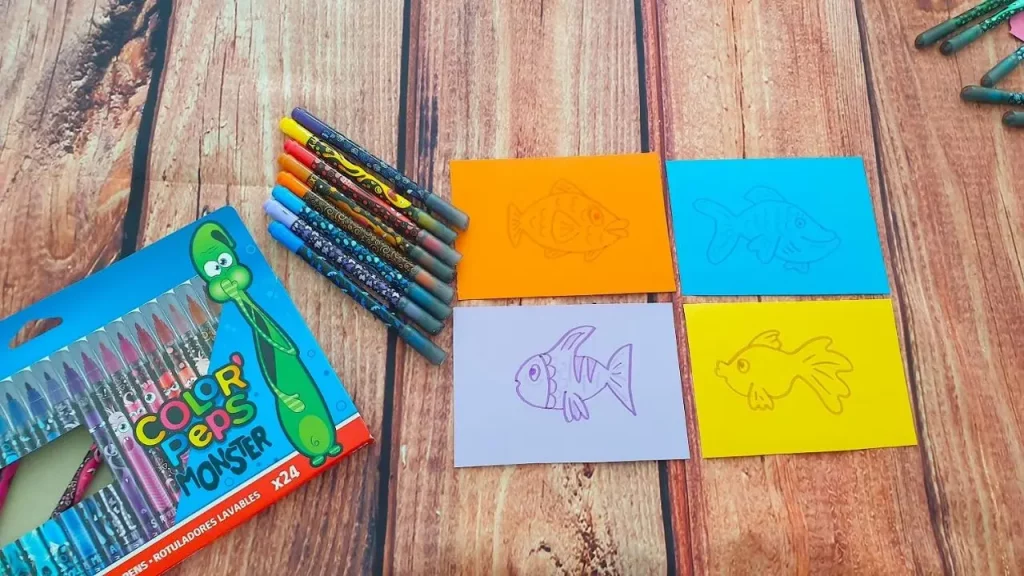
Draw outlines of fish on to the coloured paper. You can leave them plain or decorate with felt tip pens.
Step 6
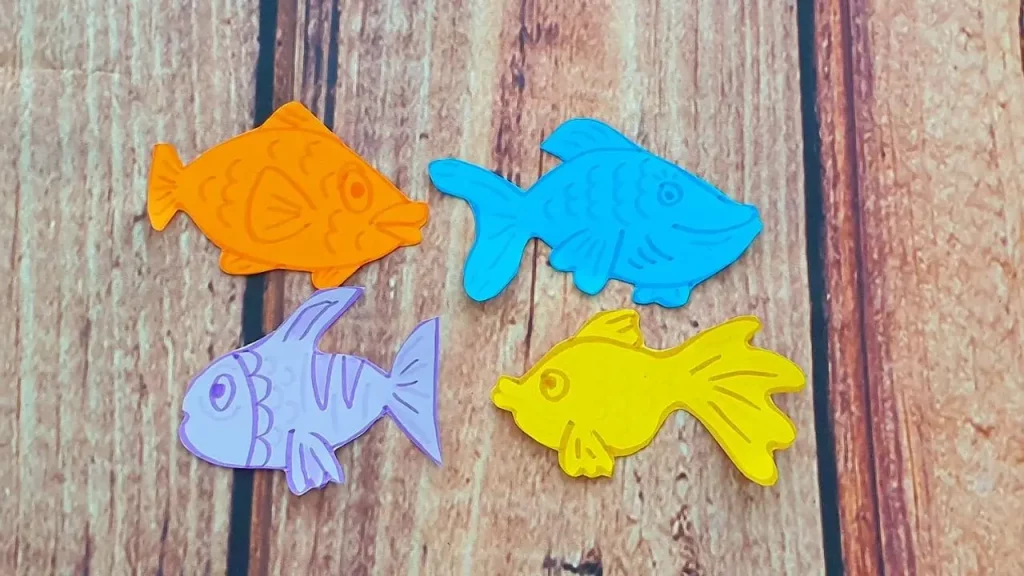
Cut out the fish and then make a small hole at the top of each fish using the thumbtack. Thread the nylon thread through the hole to allow you to hang the fish up.
Step 7
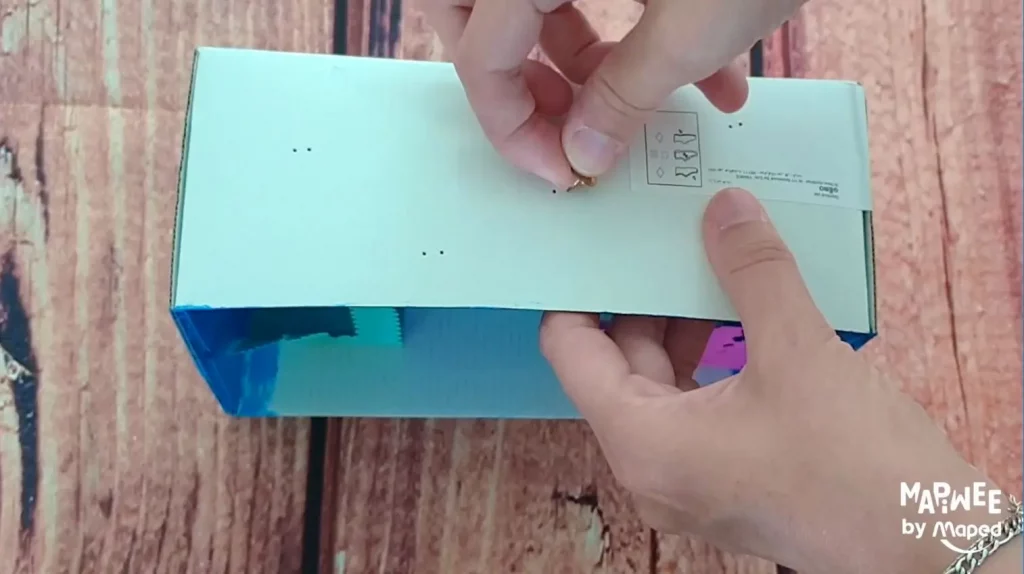
Using the thumbtack, poke holes in the top of the shoebox. You will need two holes side by side for each fish.
Step 8
Hang the fish from the top of the box, at different heights with the nylon thread.
Step 9
It’s nearly ready!
Step 10
Add pebbles, sand or shells to the bottom of the aquarium and it’s finished!